Monday, November 16, 2009
Potable water and hydronic heat
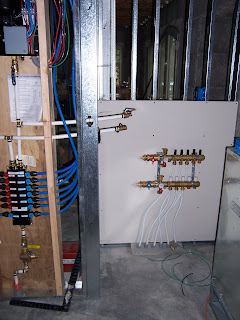
On the left is the potable water installed in the single downstairs wood stud bay. All water comes through a manifold that allows a "home run" to every fixture and a shut-off for every fixture from the utility room. Above it is the demand hot water heater. There are two white 3/4" PEX pipes heading towards the hydronic manifold that are not yet connected. That's because there are still two pumps that need to be connected (plus some other stuff) for the radiant floor heat. But, other than two little water pumps, you're basically looking at my water heater and "furnace." The metal box on the right is the back of my zero-clearance fireplace, so you can see how small a utility room can be with this system. You can click on the pictures for a better look.
Some electrical stuff
 We get several power outages every year. Two years ago, it was for five days. This little panel is hardwired into the service panel and has an outside 30 amp outlet for connecting to a generator. I can then run one 240V circuit (the well pump) and four 120V circuits (lights, fridge, freezer and septic pump). No extension cords coming through the windows!
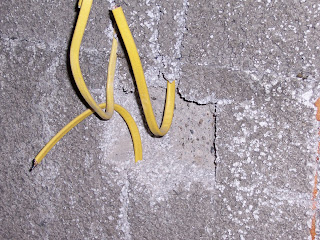
The wires are routed in the ICCF using an inexpensive electric chainsaw. The box is cut out using a drywall jab saw. In this case, the position that I really wanted for the triple box was right where there was some additional concrete (on the right-hand side). It took a few minutes with my little air hammer to get it to fit correctly.
The box is then foamed into place.
The attic area
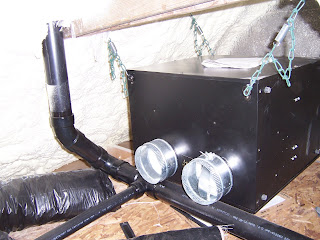
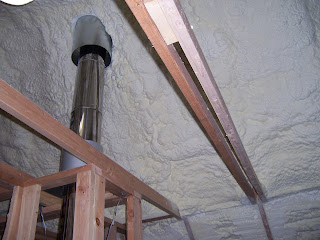
Here's the ERV hanging from chain/springs to isolate any noise or vibration. That's my rat's nest of vent pipe going up through the ceiling. It's common practice to just go up through the roof several times with the vents to simplify the system (and save on pipe). However, if you talk to a roofer, they'll tell you that they figure in $50-100 for every vent they have to flash, so there's no money savings by having 3 or 4 roof penetrations. On the closest duct, you can see that it has a damper. That allows balancing the system so that the ERV doesn't cause high or low pressure in the house when running.
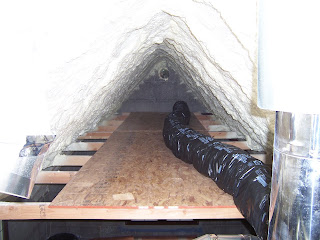
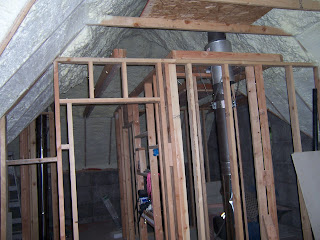
This is one end of the L-shaped attic. The ERV intake is out the gable end. The insulated duct isn't hooked up in this picture. Code requires that it be insulated, in part because it could get condensation on it. In practice, I haven't seen that happen where an ERV is used to control humidity. Even still, there's no reason to have 25' of cold 6" pipe in your conditioned attic. I used insulated duct for several feet on the other distribution pipes from the ERV. A few feet really cuts down on the fan noise that runs through the system. Makes it whisper quiet.
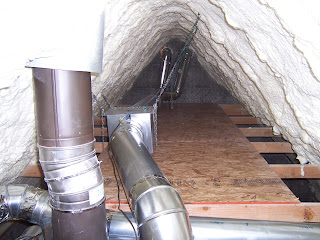 This is down the other "L," showing the duct for the kitchen hood fan. The fan motor is remotely mounted and suspended from the roof with chains and springs to isolate noise and vibration. Since it is two floors up from the kitchen, it can't be heard in the kitchen. It can be heard in the spare bedroom, but it's not annoying at all. Once I get the variable rheostat on it, I don't know if it can be heard even upstairs. The other HVAC is the kitchen woodstove chimney and the ERV exhaust from the bath and second bedroom. The attic areas are kind of small, but I've noticed one great thing with spray in foam. It doesn't hurt at all if you bump your head.
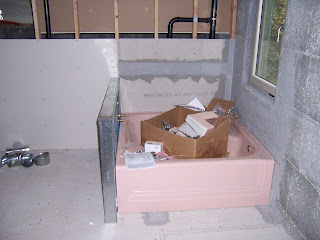
You can see that the plumbing is in the framed wall. Makes things easier.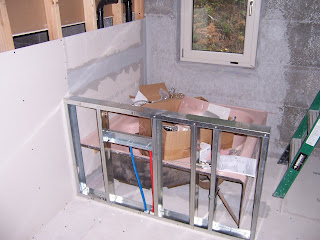
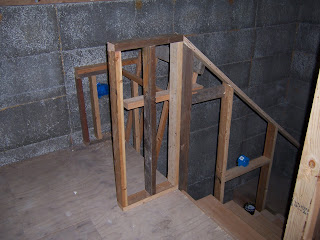


At the top of the stairs is a little built in desk for a computer. There's a double outlet box and an area for routing cables, etc. up behind the working surface. The wood-framed pony wall that separates the flights of stairs solves a couple of issues. First, it gives me a simple area to fasten the handrailing. Second, it provides for a sconce light (the blue box). That allows me to change a stairway light bulb without trying to get a ladder on the stairs.
The stairs are in.
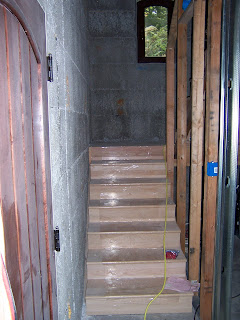 While on vacation, I contracted out the building of the stairs. They were supposed to be 7 risers to the landing and 6 to the next floor. I had even cast bolts into the concrete for the landing. What I got was 6 to the landing, so the window is higher than it should be and the landing is narrower. Oh well.
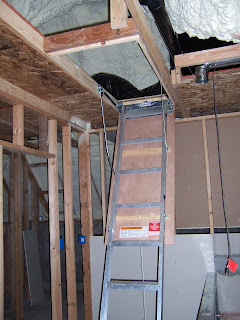
There are also stairs to the attic. Glad I did this. Even though I don't intend to go into the attic very often (it's not a storage attic), the $100 spent for the stairs was worth it just for the construction phase. I probably saved myself from moving a ladder 100 times while installing the DWV, air handler, kitchen fan ductwork, bath fan duct, etc.
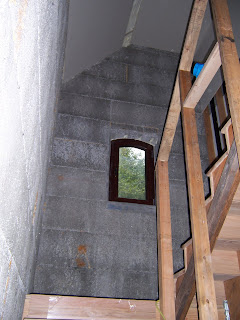
Here you can see the shape of the stairway ceiling. Is formed in part by the roof line. Before the stairs were built, I used my drywall lifter to place the full sheets of drywall up there (about 17 feet). I also used the Genie Lift again to move all of the wood flooring up before the stairs were built. No reason to carry 30 bundles of flooring up a U-shaped stairway. Much easier cranking up the packages of wood, dropping them on to a dolly on the second floor, and rolling the bundles into the bedrooms.
I've got an excuse for not updating the site.
First, some fishing to get the freezer full for a while.

Then, a few days in Athens. After Athens, a ferry to the island of Naxos.

Then, a few days in Athens. After Athens, a ferry to the island of Naxos.

The back road to our the little town on Naxos and our rental "cabin." The other road is paved. You have to check out  http://www.uni-bielefeld.de/psychologie/ae/Ae01/hp/scharlau/naxos/e_haeuser.htm
 bielefeld.de/psychologie/ae/Ae01/hp/scharlau/naxos/e_haeuser.htm to get the full picture. The "cabins" are actually built of marble, with marble floors, fireplace, counters, sinks, shower stall, etc. We had a wonderful time with wonderful hosts. Highly recommended.
 http://www.uni-bielefeld.de/psychologie/ae/Ae01/hp/scharlau/naxos/e_haeuser.htm
 bielefeld.de/psychologie/ae/Ae01/hp/scharlau/naxos/e_haeuser.htm to get the full picture. The "cabins" are actually built of marble, with marble floors, fireplace, counters, sinks, shower stall, etc. We had a wonderful time with wonderful hosts. Highly recommended.
Monday, June 15, 2009
A start in the bath
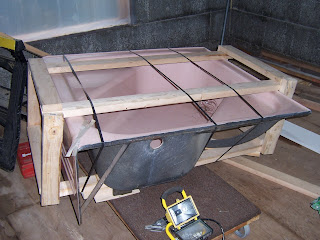
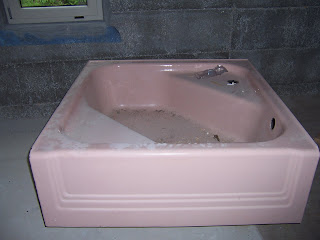 The tub has been in the upstairs bath for awhile. I've put down Hardiebacker on half of the floor and will be able to finally set the tub (it's on a dolly). Then, I can finish the Hardiebacker and tile the floor.
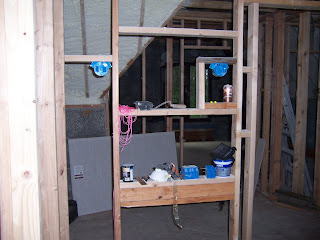
Kind of elaborate framing, but the sink is a vintage wall mount with a built in medicine cabinet and sconces on both sides. It might even need a little more framing. Makes a good place to put small tools for now.
Finally
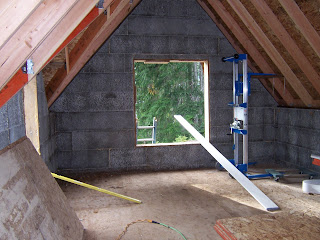
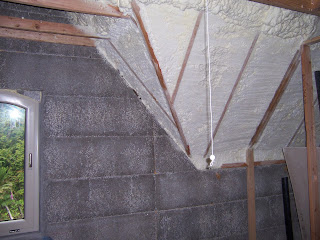 The foam is sprayed into the rafter bays and then shaved back so that drywall can be attached to the "attic bedrooms." You can begin to get a feel for the shape of the bedroom ceilings.
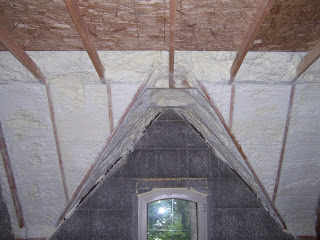
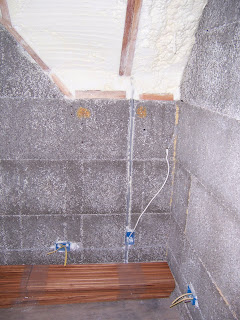 Conduit was routed from the attic to electrical boxes in the bedrooms and the livingroom in case somebody wanted a telephone or cable TV. The hardwood flooring is stored around the room perimeter.
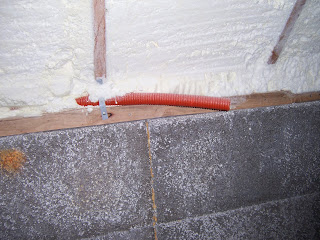 Here's "smurf tube" flexible conduit to allow the routing of data cables, etc., to the computer work station. It also starts in the attic.
Time out for clam digging
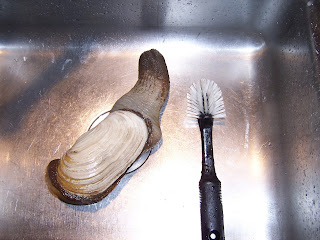 This is our local giant clam, the geoduck. One clam feeds four people, and that's four people that love clam.
Steel framing
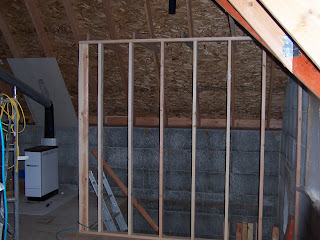
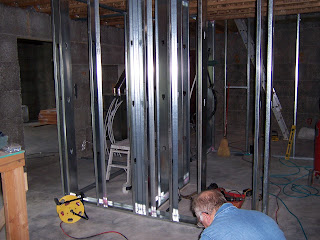
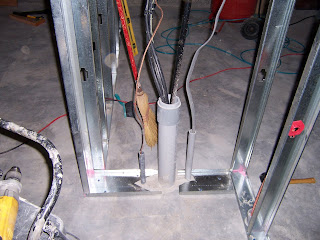 While waiting for the county to approve my use of spray foam insulation (3 months!!!), I framed in the downstairs. I had planned on using steel for several reasons. First, there's no fuel for fire. Second, with radiant floor heat, the steel studs act as a radiator, transmitting heat more than 50 times faster than concrete. Third, I can carry all the framing material at once on the top of my truck (it's a small area). Fourth, steel has a lower sound transmission than wood. The toilet is right next to the dining area, usually a forbidden design. But with a 6" steel stud wall and fiberglass insulation for sound, we will see.
Stange duck
Fireplace install
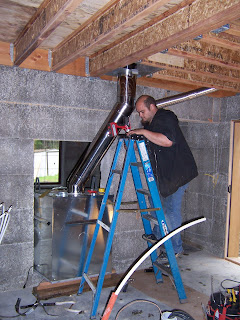
Here's the fireplace installed in the livingroom wall. The area above gets framed in with steel, some hardiebacker, and then plastered.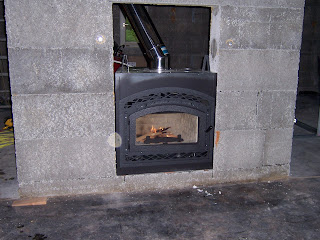 The zero-clearance fireplace has ductwork that will be routed to heat the upstairs.
 The zero-clearance fireplace has ductwork that will be routed to heat the upstairs.
Tuesday, February 17, 2009
Doors and Floors
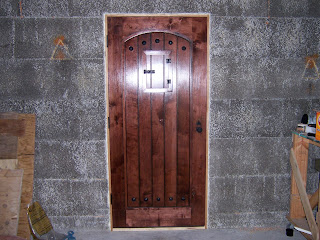 Here's the door to the porch. It has a speak easy. I don't know why Beth didn't take a picture of the other side.
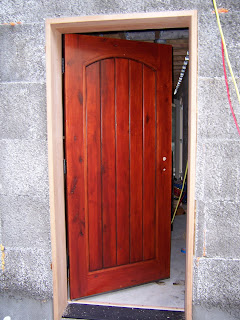 Here's the other exterior door. Because it has exposure to the sun, I used a different finish that has a UV filter in it.
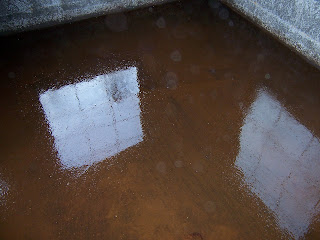
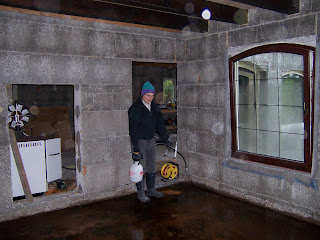
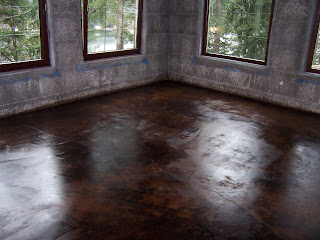
Then came the acid stain on the floor. It turned into a rusty terracota color, not at all what it was supposed to look like. But that was just the color of the residue created by the acid. Beth is then neutralizing the acid with baking soda. The condensation on the window is on the outside. The house gets cold at night and stays cold during the day.
Next, I used a wet vac to remove the neutralized solution. You can now get a better picture of the color.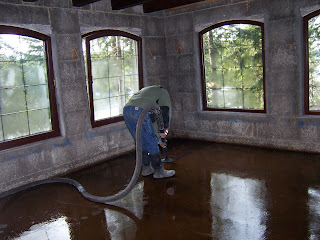
 Check your shoes for holes.
Next, I used a wet vac to remove the neutralized solution. You can now get a better picture of the color.


 Check your shoes for holes.
 Sunday, January 04, 2009
Snow days
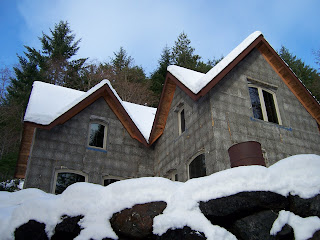
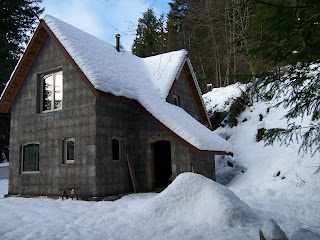 We had a little snow that lasted from a few days before Christmas until after the new year. I needed chains on all four tires to get out on January 2nd.
Tuesday, December 16, 2008
Doors and windows
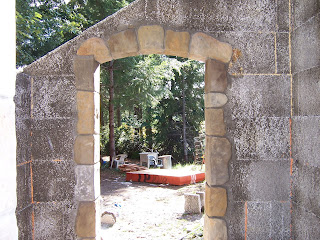
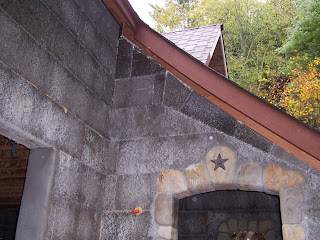
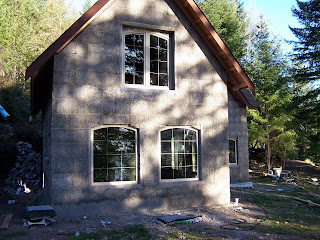 This is looking at the livingroom with the master bedroom gable window above. The gable window doesn't have the arch infill yet.
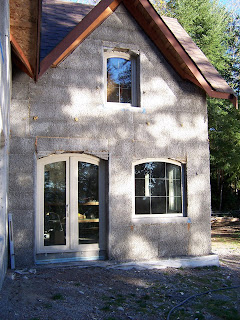
Here's the view from what will be a little patio area looking at the kitchen door and window. Above is the dormer window for the spare bedroom. The rough areas above each door and window will have to be smoothed out when the house gets its stucco. You can see the insulation under the slab by the door. I added a little more insulation and cast a limestone threshold there.
Window pictures
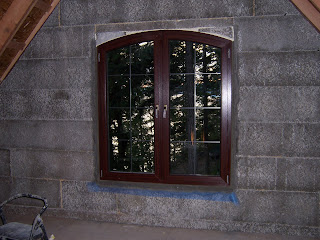
The master bedroom windows are the same except they're mahogany. Double click on the picture and you can see the nice sunset.
Saturday, November 15, 2008
Window installation
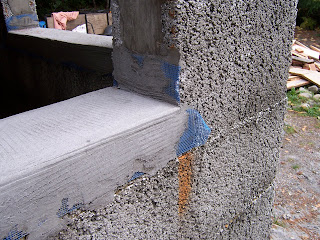 How to put in windows without any wood for the nail fin? Here's my sequence. First, the ICCF sill is covered with a fiberglass mesh and stucco. This makes a bullet-proof support for what will be large, heavy windows. The mesh is identical to that used with EIFS. Removal will require a sledge hammer. You can see that the finish is a "scratch coat" to accept additional stucco. I used a fibered stucco for additional strength.
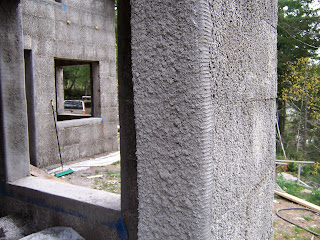 The rough opening sides also get a scratch coat, followed by a double-up application of a dash coat. If the window is placed within 24-48 hours afterwards, this coating can be knocked down with a brick rub if you've made your rough opening a little too tight in areas.
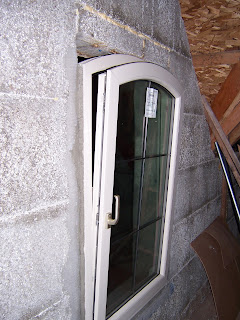
The windows are Euroline vinyl tilt-turn style. They come with a nail fin for wood construction. I removed the fins. They also have metal flanges attached to a metal angle piece that runs around the entire widow perimeter. It's kind of like a vinyl clad metal window. The tabs are attached to the concrete using tap-con screws.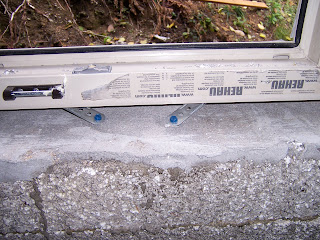
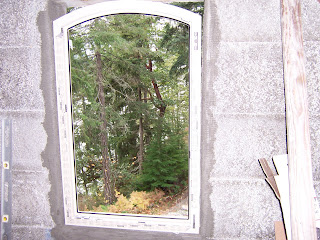
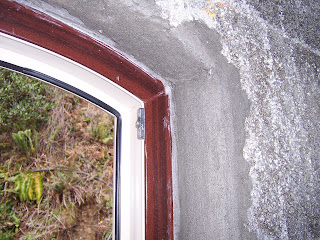
Here is a window tap-conned into place. The arched top is then filled with ICCF material and the window is grouted in to place so that the metal flanges and the entire window surround is encased in cement.


Here is a window tap-conned into place. The arched top is then filled with ICCF material and the window is grouted in to place so that the metal flanges and the entire window surround is encased in cement.
Monday, November 03, 2008
Rocks from the beach
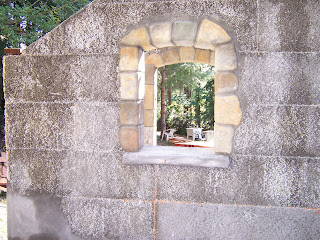
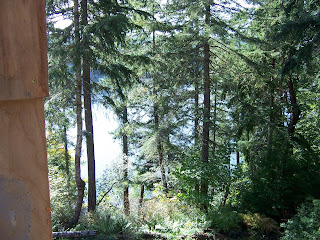
A room with a view
Backfill begins
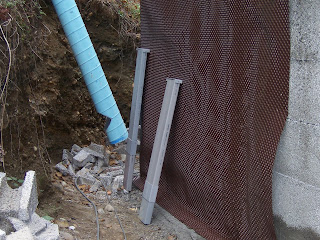
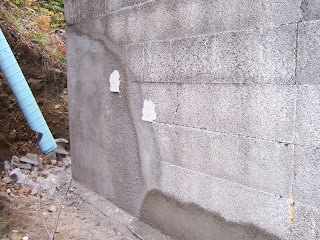 First, the part that will be underground is parged with a cementicious mix.
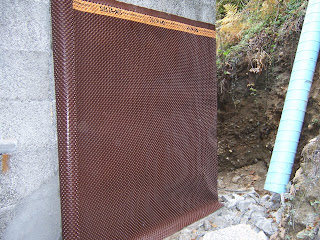
Then, Delta dimple water shield is placed against the wall and held in place temporarily with nails.
What's going on inside.
The roofing goes on
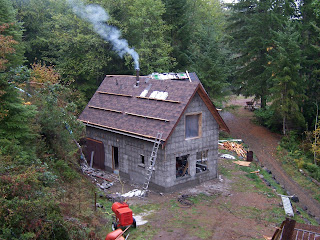 When the northside was roofed, and the chimney went in, I lost no time in connecting the chimney and heating up and drying out the insides.




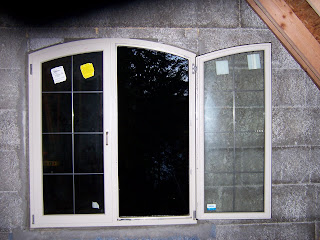
 These are tilt turn windows, so you can get a little ventilation without opening them so that the wind can blow them open or closed.