


My parents were visiting several months ago and my dad had a book with him that had a wide elastic band around the outside cover. I asked him what it was and he showed me that it was this great little bookmark that held its pages closed and secure…..no matter what. So no more throwing your book in a bag and the bookmark slipping out, no more folding pages to mark your spot because you know your bookmark will slip out, and no more getting frustrated with little fingers who leaf through your book and lose your place on accident. No more of any of that. Genius idea!
Since then, I have seen many different sizes and styles and variations of this same concept. Most of them have a plastic base with some wide elastic that threaded through it at the top…….but I knew the plastic part would be tricky to duplicate. So I figured I could come up with a replacement for the plastic. Yes……fabric!

It really is as simple as pie to use. (Wait, pie’s not always that simple…..where did that saying come from??)
Anyway, it’s super easy.
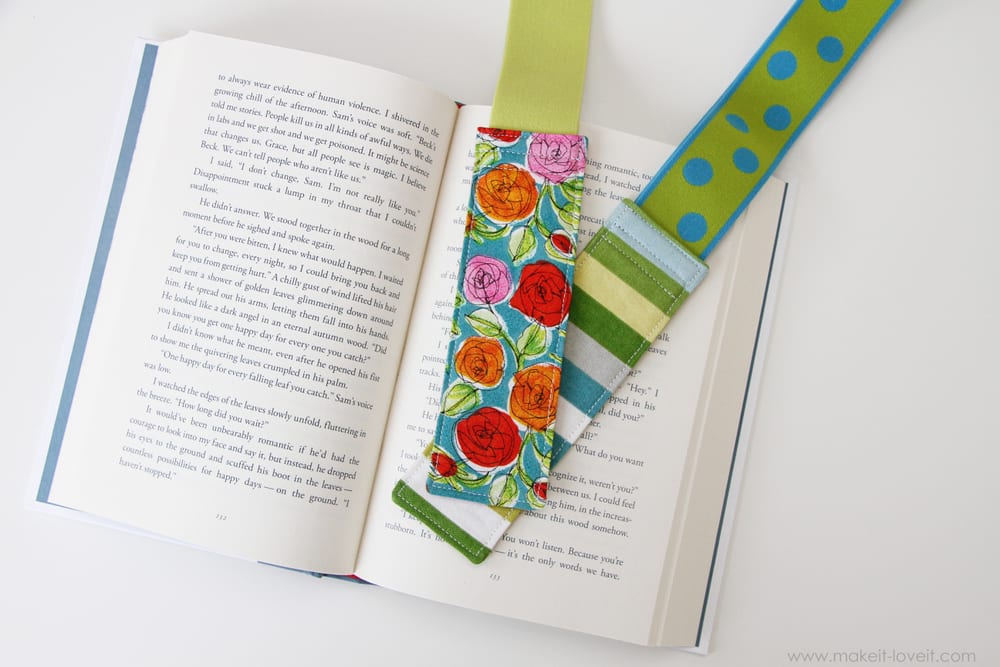
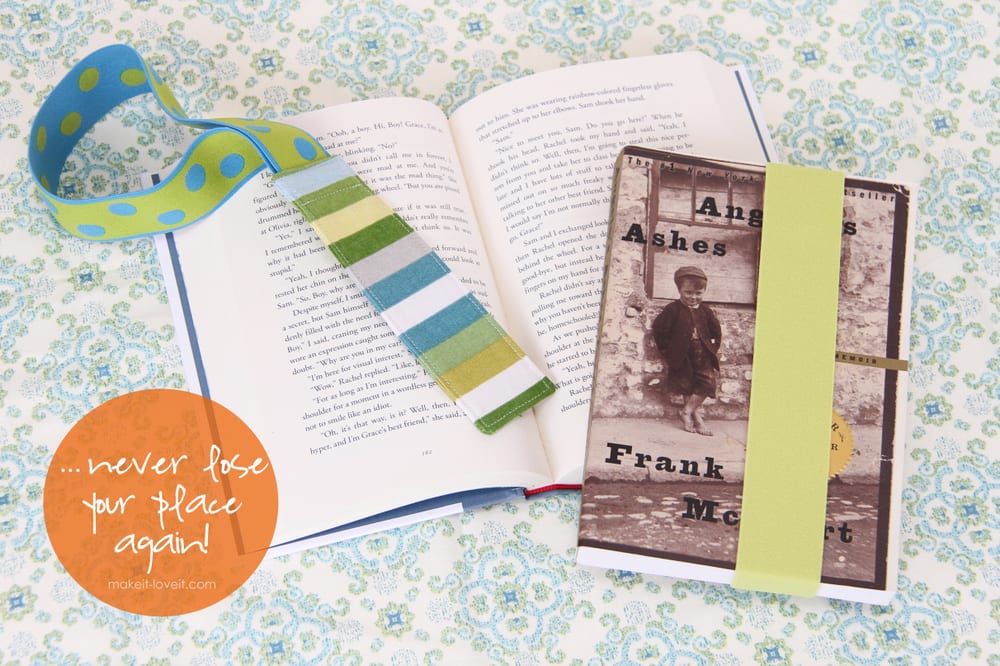
Just place the fabric section of the bookmark in the page you want to mark, close the book, turn the elastic inside out, and slide around the outside cover of the book.
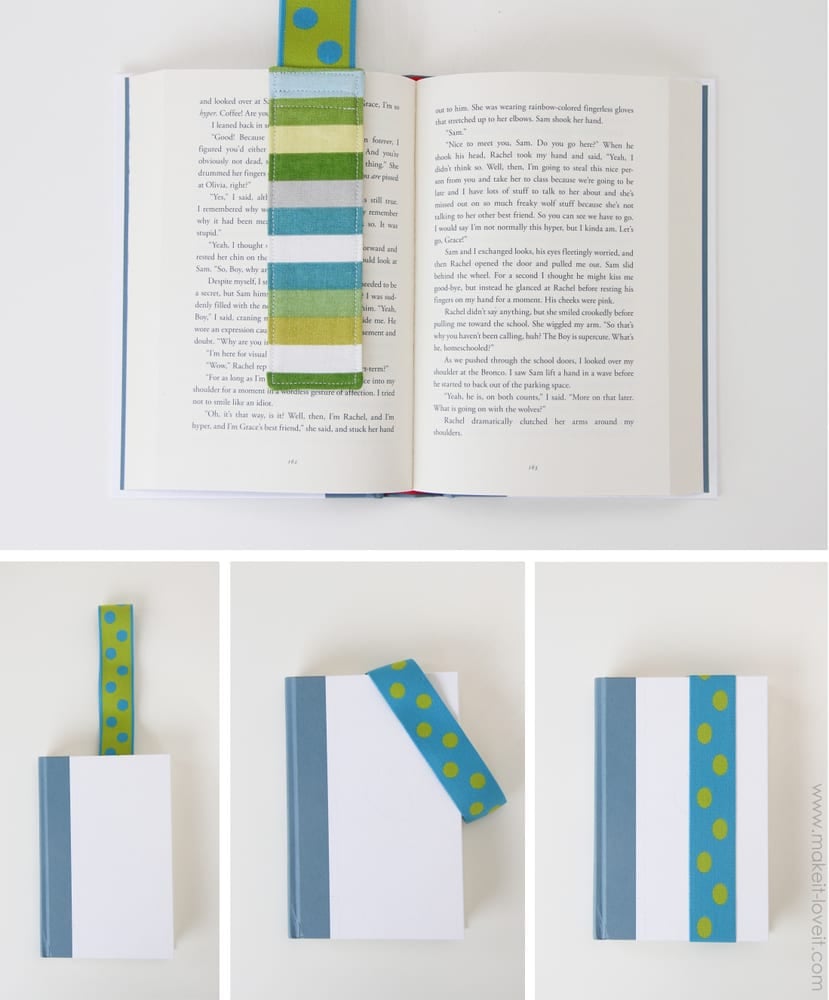
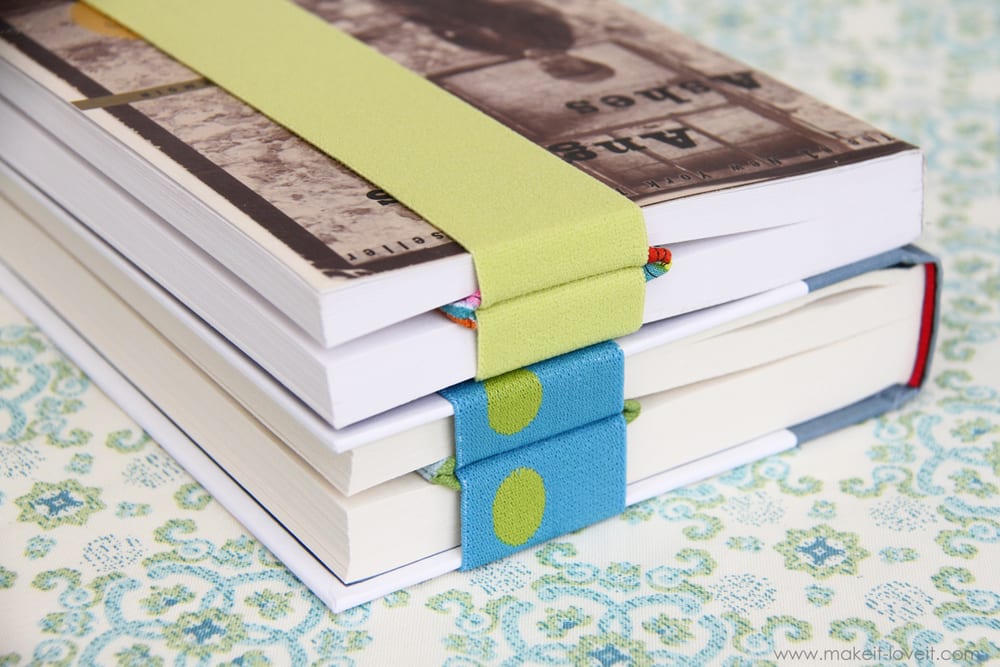
The elastic keeps the book closed and protects all the pages from fluttering open in the wind, getting bent in your bag, etc…….and the fabric section marks your place. Cool, right?
I dare ya…….drop it and see if your pages fly open. (don’t worry, there’s not really any sound…)
See? Works like a charm! Haha! :)
(No laughing at my amateur video skills! I’m sure you could have visualized without the video….but the way I always lose my bookmark, is by dropping my book. I’m easily impressed……so, I love that I can drop my book a trillion times, and still not lose my place. Yay!)
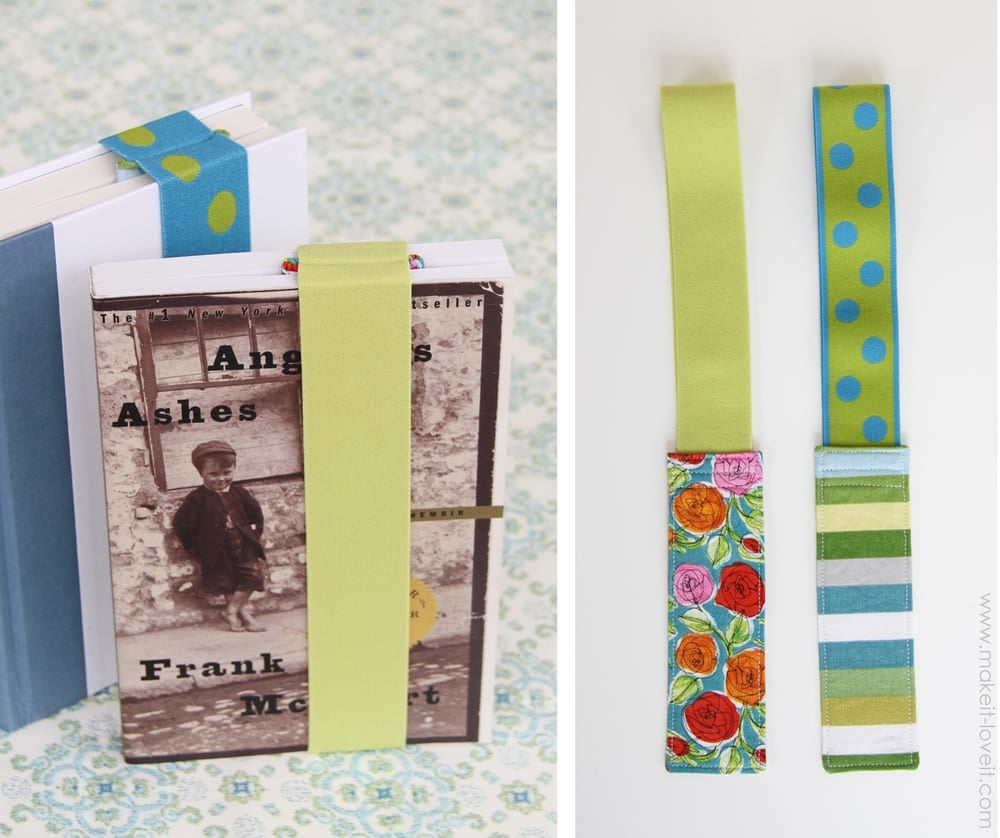
What a great gift to give alongside your favorite book. And why not make the recipient two?? I can’t stand doing this, but I know many people rotate between 2 different books at once. So, yeah, better gift 2 bookmarks to that sweet friend of yours!
Also, if you’re a beginner sewist……give this a try. It’s a great project to learn on.
Mission accomplished.
No more missing bookmarks or lost pages. Love it!
Would you like to make a few for yourself??
First of all, you’ll need cotton fabric. The floral fabric is quilting cotton and the striped is upholstery fabric (which means it’s nice and sturdy). Both are cotton though.
Cut out 2 pieces of fabric (per bookmark) that are each 2.5 x 7 inches.

Then, cut out some fusible interfacing that’s a 1/4 inch smaller on all sides…….so 2 x 6.5 inches. Then lay it face down on the “wrong” side of your fabric pieces and center it a 1/4 inch away from all the edges. Iron it to adhere it in place. (Need help understanding fusible interfacing??)

The grab your 2 bookmark pieces and place them together, with right sides together and then sew them together along the two sides and the bottom, using a 1/4 inch seam allowance (shown on left). Then, clip the two bottom corners off, being careful not to cut through the seam you just made (shown on right). (Need help understanding why you clip corners of fabric??)

Now, turn the tube right side out. (I like to use a pencil and use the eraser end to shove the fabric inside of itself.)

Next, poke out the corners and iron the tube flat. Then, fold the edges of the opening inside of itself a 1/2 inch and then iron flat.

Next, cut a 1.5 inch wide piece of elastic long enough to fit around your books nice and snug. All elastics will stretch a little differently, so you’ll need to experiment around a few books. This elastic (more info on where I purchased it) is nice and stretchy and I cut a 16.5 inch piece. Then I folded it in half and lined up the ends with the opening of my bookmark tube.

Then I slid the ends right inside the tube opening, overlapping by about an inch…..and pinned it in place.

Then, I sewed around the outside edge of the entire fabric portion of the bookmark (making sure to sew through the elastic as well), an 1/8 of an inch from the edge. Then, I sewed 2 more lines of stitches through the top portion of the fabric, about a 1/4 inch apart……catching the elastic in between the layers of fabric. I did this to prevent the elastic ever pulling out.

And that’s it!!!
Cute and functional little bookmarks. To keep……or give away! :)
Enjoy!
-Ashley
. . . . . . . . . . . . . . . .
Featured Sponsor:


You are so adorable for creating that video!!! I’m glad to see that it works. I’ve had the same problem, so I will be sure to whip up a couple of these.
fun! And you’re right, pie is NOT easy!!
Ha……someone who agrees with me! ;)
Super idea! I have never heard of it before, so simple and clever. Thanks for the DIY….and video, ha ha.
Great idea, i will try it Thank you
Love it! Do you know of any stores that carry the elastic without ordering on line?
I’ve also seen it at Joann Fabrics. Maybe Hobby Lobby carries some too?
I’ve seen it at Hobby Lobby where I live, it just depends on where you’re from I think.
Very sweet!!! What fun elastic. I might need to actually get out of my comfort zone and order some. My librarian mother-in-law would really love one of these.
Is that supposed to be 5.5 inches or 2.5 inches? Doesn’t look like it is that wide unless it is doubled.
Oh gosh, yes, it’s 2.5. I just changed it. Thank you!!!
No problem! :) It is such a great idea. My husband is gonna love it. And so will the poor turned down corners of his books.
JoAnn’s only carry black and white elastic. :(
Oh darn, my Joann’s carries a variety of colors. Try Joann’s online…..or rufflefabric.com! :)
Hi! I love your blog so much that i’ve nominated you for a Very Inspiring Blogger Award! http://fairyfingers.blogspot.ca/2013/04/very-inspiring-blogger-award.html
Thanks!!!
Love. I need to make some. Half the time I don’t even HAVE a bookmark, and try to memorize what page number I’m on when I put the book down…
Thank you so much for yet another lovely project. I am a bigginer and I follow your blog religiously as I have learn so much from it.
This is the perfect present for my two best friends who are about to live for another posting ( we are expats). If you have any totorials for a kindle cover how would be very interested. They are both big readers and are slowly moving to the easy to carry electronic version.
Sorry for the long comment.
Looking forward to the next posting.
Would the 1″ or 3/4″ elastic work just as well?
Yes, it would work just fine. If you don’t like the fabric so much wider than the elastic…..you could just decrease the fabric width a bit. :)
So cute! I’m totally going to make one of these. (I just bought a ton of elastic from Pick Your Plum and now I’ll have something other than baby headbands to make with it.) Thank you!
Oh yes! That would be perfect!
love it!
oh, brilliant idea !! I no need to worry loosing the page mark no more.. thank you for the tutorial, Ashley
Could head bands be used? My daughter has some cute ones she no longer uses that still have lots of stretch.
Fabulous bookmark…..fabulous idea. I need to make a few soon. Thanks.
Great!!! Love it!!!
so easy, thanks for the tutorial! love it
what an awesome idea! love it! :) lisa
I love it so don’t be surprised to see it on my blog some time from now .-) It is a very clever idea. Thanks to sharing with us.
Great idea! thanks for this!!
Great end of year gift idea for your child’s teacher!!
So true! I love that idea!
This is so clever! I have to make one for my mom now. She reads voraciously.
And I take the pie saying to imply “Easy as *eating* pie” he he. :-)
Haha……true! That’s it…..I’m changing that saying to, “easy as eating pie!”
I have one of the plastic style from Levenger and I LOVE it because it doesn’t break the binding since it’s used at the outer edges of the pages AND it holds the book tightly shut in a tote bag. Now if I can just figure out a way to put a little pen loop in the elastic to store a highlighter and pencil with my book. . .
Great idea!
I’ll be sewing some soon, tx for sharing…
Pinned ;)
MammaNene
SergerPepper.blogspot.it
I love this. Now I need to make several of them. Thank you so much for sharing with us.
This is such a neat idea! I can’t wait to make this. Thanks for sharing (^_^)
So brilliant, Ashley! We should totally collaborate, some time. Here’s my shout out and blog post for these great bookmarks. http://sugarmamassweetbowtique.blogspot.com/2013/04/stay-put-bookmarks-via-make-it-love-it.html
Thanks for the tutorial!
Instead of fabric I would use a piece of wide ribbon and elastic for minimal sewing
We live in the middle of nowhere so we can’t get cute elastic so we went to family dollar and bought little girl’s hair bands-12 for a dollar.They work great and they look really cute. Thanks for the awesome idea!
Well, I love the idea of the bookmark and will read through the tutorial again but I just had to comment that I LOVE your book choice! Angela’s Ashes is/was one of my favorite books (I read the sequel also and enjoyed that too)! Now, to go back and read the tutorial and make some of these neat bookmarks!
I love this! Now I know what to make my bookworm son for his birthday, since he’s always losing bookmarks.
What a great idea, it is simple modifications to the things we love that make all the difference. Like how the saying goes…its the small things that count!
What a great beginning sewing project for children. You could use plain, light colored material and then allow them to use fabric pens and decorate their bookmarks.
Been dreading mothers day because I can’t ever find anything unique for my avid-reader mom. Thanks for saving the day! I havea ton of that elastic and now can use it for something besides waistbands. Thanks!
just made a bunch of these for christmas presents! so inexpensive! my 5 year old was watching me make them and loved them so much, that I had to make her some too. Thanks for the awesome idea.
Very cute idea that can be customized for each avid reader.
Thanks so much.
Hey it’s Deonna from the Child at Heart blog. I am making this for the moms for Mother’s Day! Such a simple sewing project! That elastic is SO cute! I’m doing a Mother’s Day giveaway so come on over if you get a second :)
http://www.thechildatheartblog.com/2014/04/mothers-day-homemade-spa-gift-idea.html